# Student Profile Page
A student's profile page is where all their information is kept, and where you interact with the student. So how do you get there?
# Finding a Student's Profile
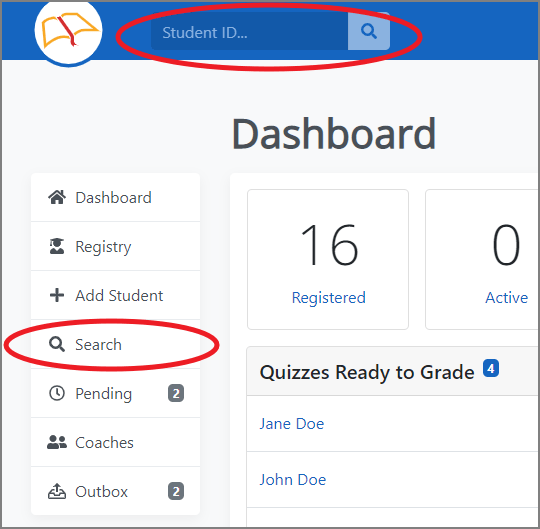
If you don't have many students, you can just find the student in your registry and click on their name. You can also find the student by using the search feature. Or, if you happen to know the student's ID number, you can type it in the search box at the top of the screen, and you will be taken directly to the student.
# The Main Display
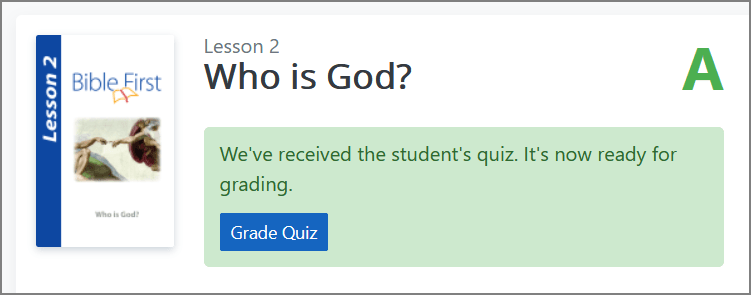
Front and center on a student's profile is the main display. Here you will find the student's name, status, current lesson, and overall course grade. There is also a green section that dynamically displays different messages depending on where the student is at in the lesson cycle. It might let you know that that the student has started reading the lesson, or that they are working on their quiz.
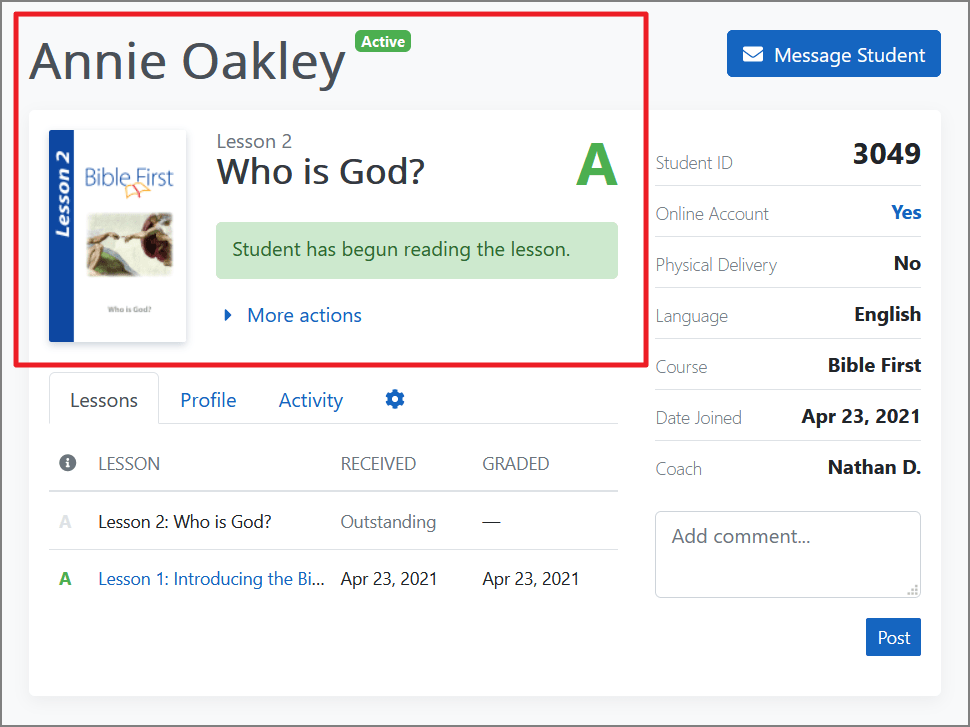
If some sort of action needs to be taken, like grading a quiz, a prompt to do so will show up here.
# Force Receive
At times, you will see a "More actions" link on the main display. If you click it, it may give you the option to "force receive" the student's lesson. On rare occasions, you might have a student that can't figure out how to submit their quiz. In that case, you could use the "force receive" button to pull in their quiz, at which point you could grade it, or potentially send it back to the student by declining it.
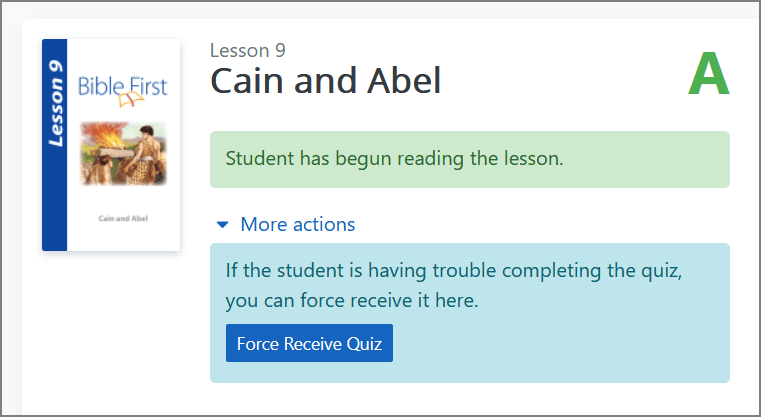
When you force receive a quiz, it gets received in whatever state it is in. If only half of the answers are filled out, then the other half of the questions will be blank. Needless to say, force receiving a lesson is something that you will rarely have to do, if ever, and it should only be a last resort.
# The Info Panel
The info panel displays a bit more information about a student. Some things, like the student's ID number, can't be changed; other things can be changed in the student's settings tab. At present, the status of the Online Account also happens to be a hyperlink that will take you to the page for managing the student's online account.
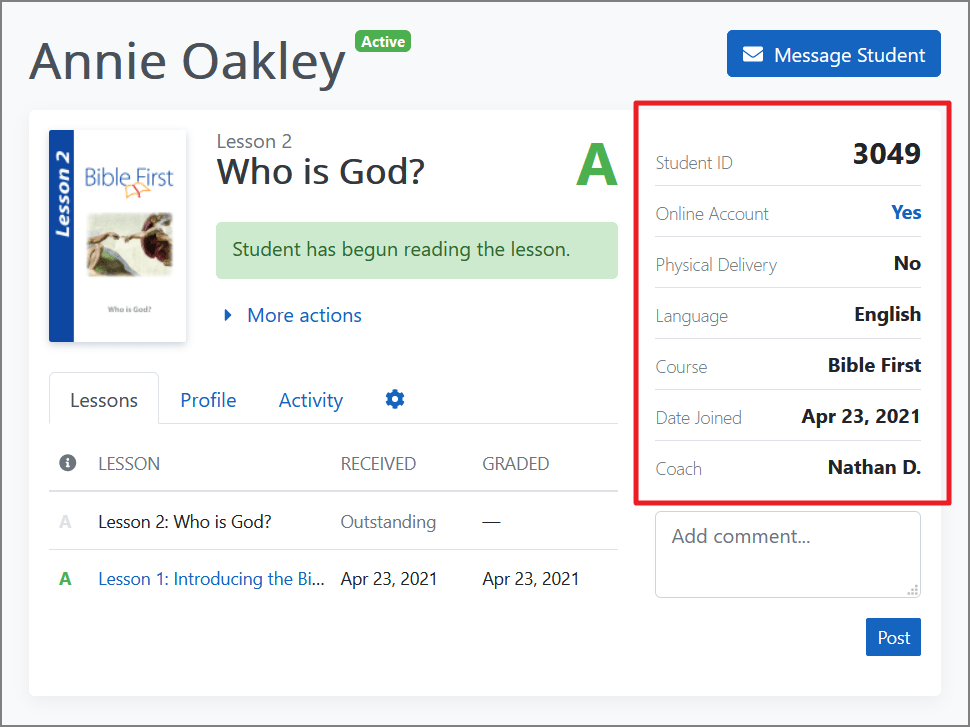
# Messaging
Above the info panel (see screenshot above), you'll notice a button for messaging the student.
# The Tab Area
For lack of a better term, we'll call this area "the tab area", because of all the tabs. 🙂
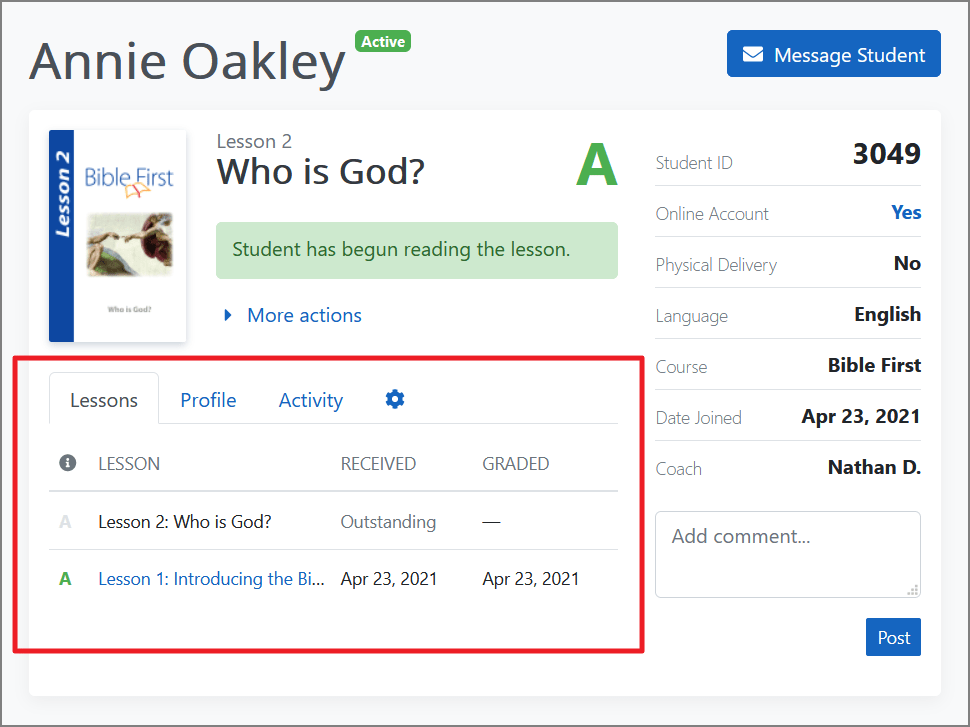
# Lessons
The lessons tab is a simple list of all the lessons a student has completed or is working on. (See screenshot above.) Once a lesson is completed, its grade is displayed, and the lesson title becomes a hyperlink to the quiz for that lesson.
# Profile
You know, the usual. Name, email, etc. To edit the info here, just click the Edit Student button at the bottom.
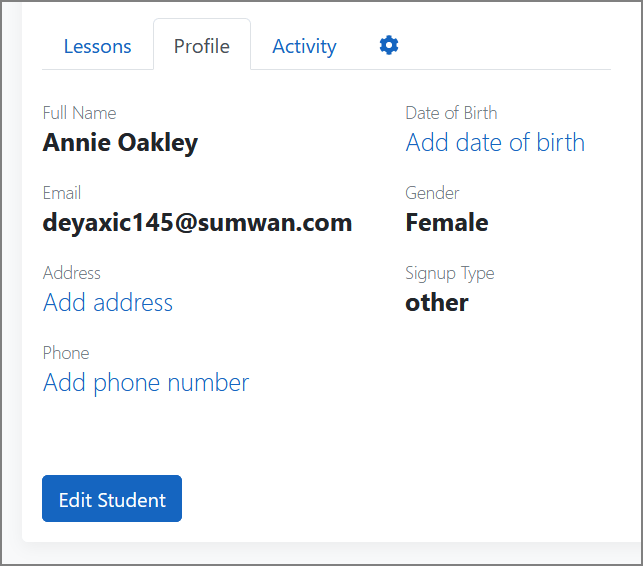
Note: If the student has an online account, you won't be able to edit the student's name and email address. Only the student can do that.
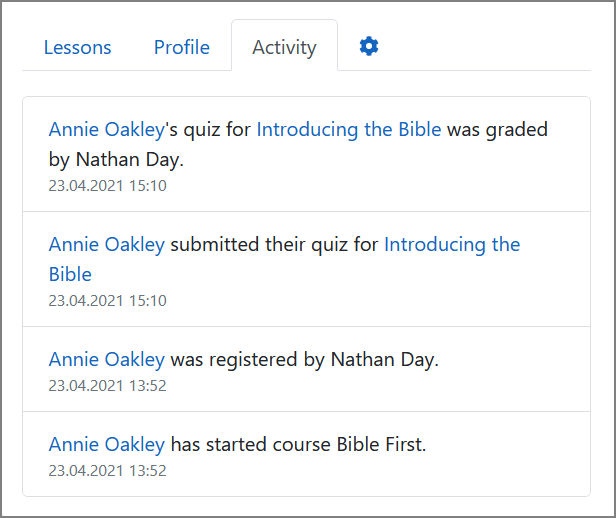
# Activity
This is a feed of certain student-related activity.
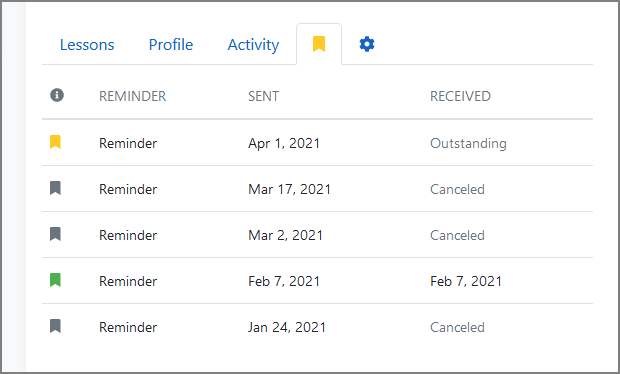
# Reminders
If a student has ever gone inactive, a reminder will be generated for them, and a reminders tab will appear on their profile. To learn more about reminders, click here.
# Student Settings
In the tab with the gear on it you will find a collection of settings related to the student.
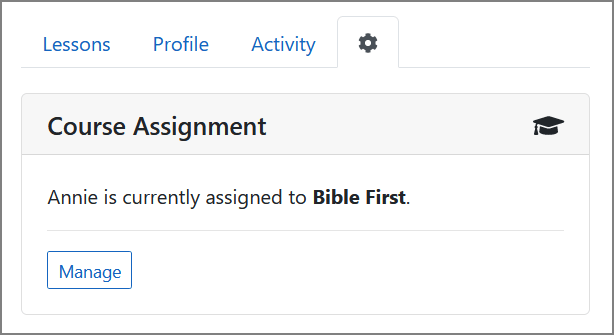
# Course Assignment
To assign the student to a different course, click the Manage button. (See screenshot above.)
Hopefully one day, there will be other courses besides the current Genesis course available, and this is where they would show up. But for now, Bible First is the only course we have.
If a student wanted to read their lessons in a different language, this is where you would change that. After clicking the Manage button in the screenshot above, just click the Change Language button and follow the prompts.
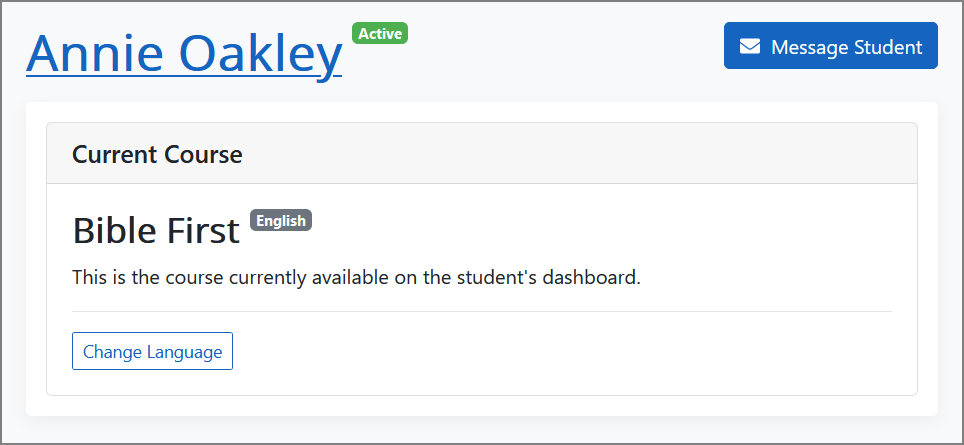
Note: If the student wants to change the language of the interface (the text displayed on the buttons, menus, etc.), they have to do that on their profile.
# Online Account
Most students will sign up online, do everything online, you'll never have to touch this section. One possible exception to this would be in the case where someone forgets their BFO password and loses access to their email address. Instead of deleting their account and starting over from scratch, you could delete their online account, and then activate a new online account for them with a new email address.
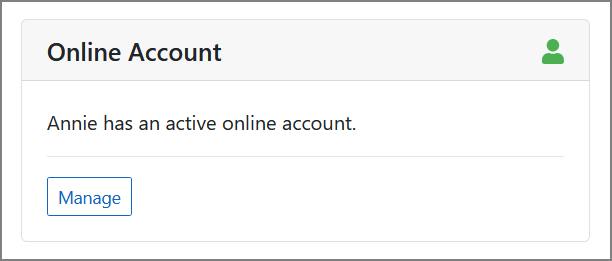
If you have offline students, you might have a situation where a person enrolls in the course as an offline student, and then wants to become an online student or a hybrid student. This is where you would go to activate an online account for them.
Once you have activated an online account, this is where you would go to resend the email invitation to the student, if need be.
On the flip side, if you had an online student, and they wanted to go old-school and get physical lessons through the mail, this is where you would go to delete their online account.
# Physical Delivery
If you enable this setting, you are telling the system that you will be sending the student physical lessons in the mail. Enabling this setting also turns the student from an online student to a hybrid student in the eyes of the system, and it will prompt you to send those physical lessons to the student.
If a student is an offline student, this setting is enabled by default.

# Coach Assignment
If there are multiple coaches in your account, this is where you go to reassign a student to another coach. Whichever coach is assigned to a given student is the coach that will be notified when the student's quiz is ready for grading, etc.
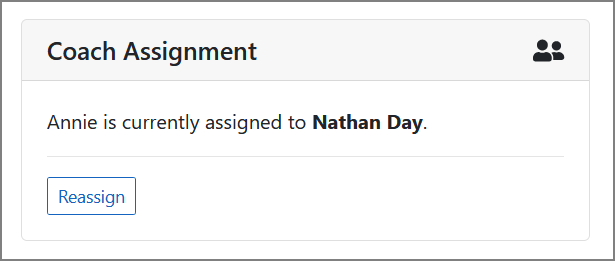
By default, all students that sign up themselves through the online signup form are assigned to the account owner, but they can be reassigned at any time.
# Student Deletion
To learn about student deletion, go to the page on student deletion.
# Comments
This is a place where you can leave comments or notes related to the student, both for the benefit of your future self, and for the other coaches in the system (if any). Things like: "Sent the student a Bible", "This student is the spouse of student 1234", "Signed this student up on the street. Said he is an agnostic." You get the idea.
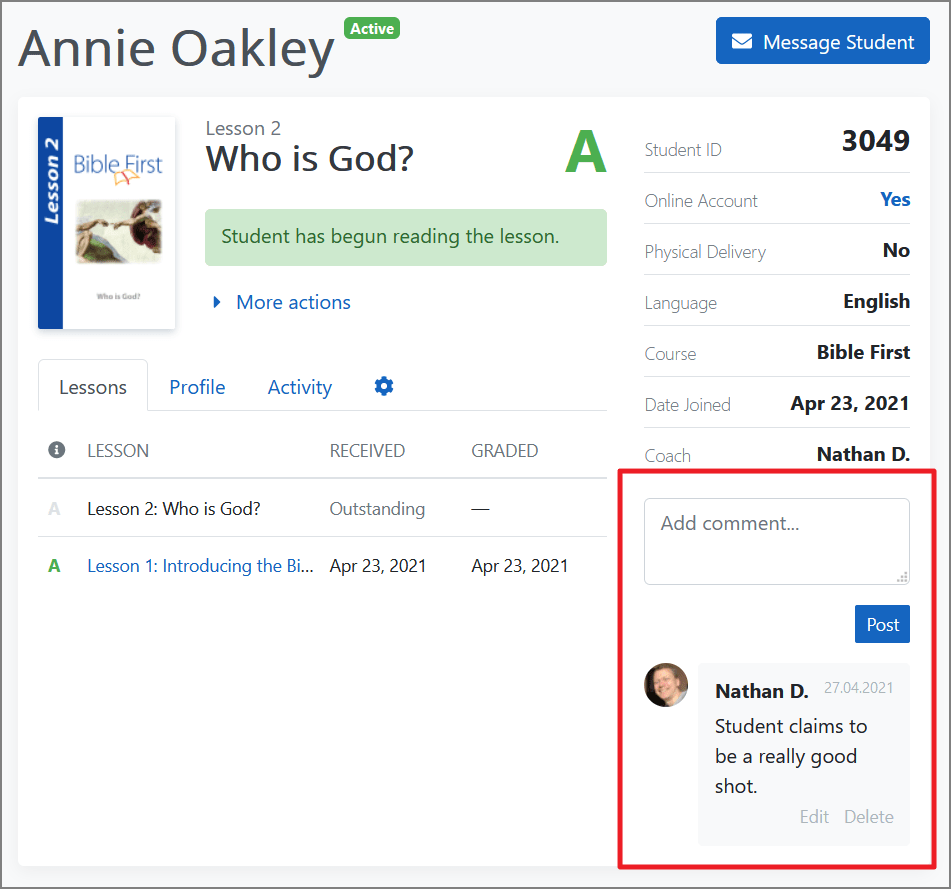
These comments are not visible to the student; they are only visible to coaches. The student will never see them, unless, of course, you invite them to become a coach in your account once they have finished the course.